Multi-cam recording setup on a budget
I have gathered the materials and configured the software necessary to create a complete multi-camera recording and streaming setup. It *can* be more affordable than my setup but I’ll show you the tools I am currently using to record videos and broadcast livestreams. Compared to using a dedicated video switcher or recorder, this setup is much cheaper and utilizes older hardware like smartphones that are no longer in normal use but can be repurposed for filming or streaming.
The showcase of this setup in action can be found in this video:
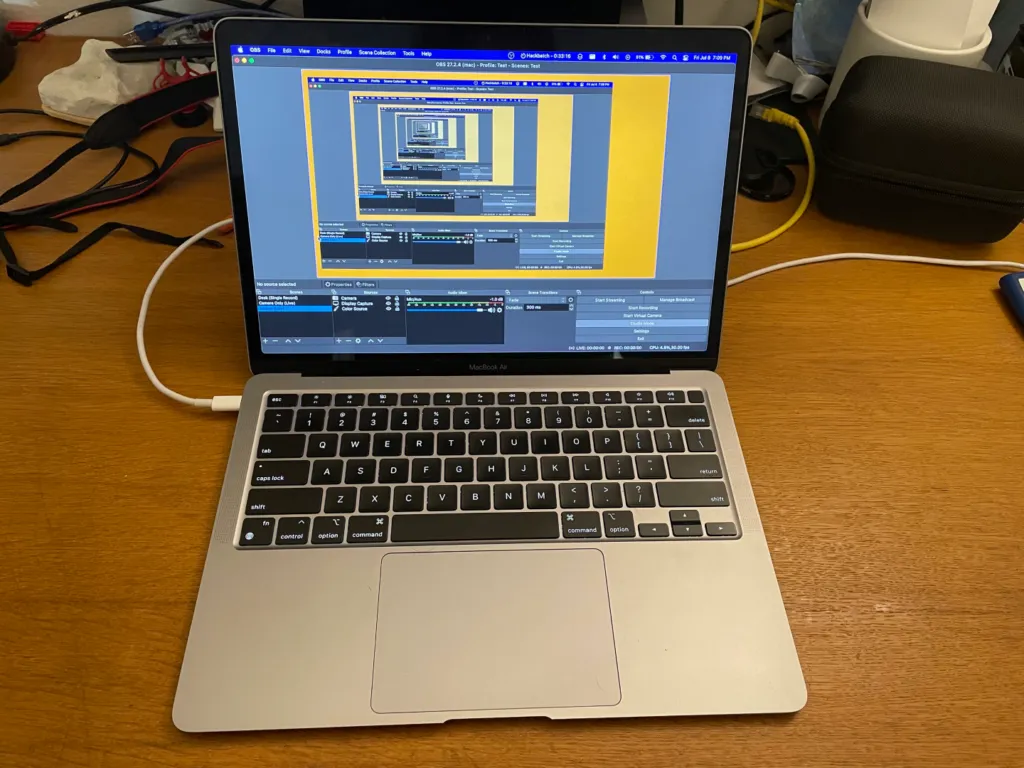
At the center of the operation is the M1 MacBook Air with 8GB of ram. This is the very base model of MacBook and is still capable of encoding four streams of 1080p video from different sources to a 4K file, while also streaming a 1080p broadcast. That’s pretty impressive for a computer with no fans!

MacBook Air Running OBS
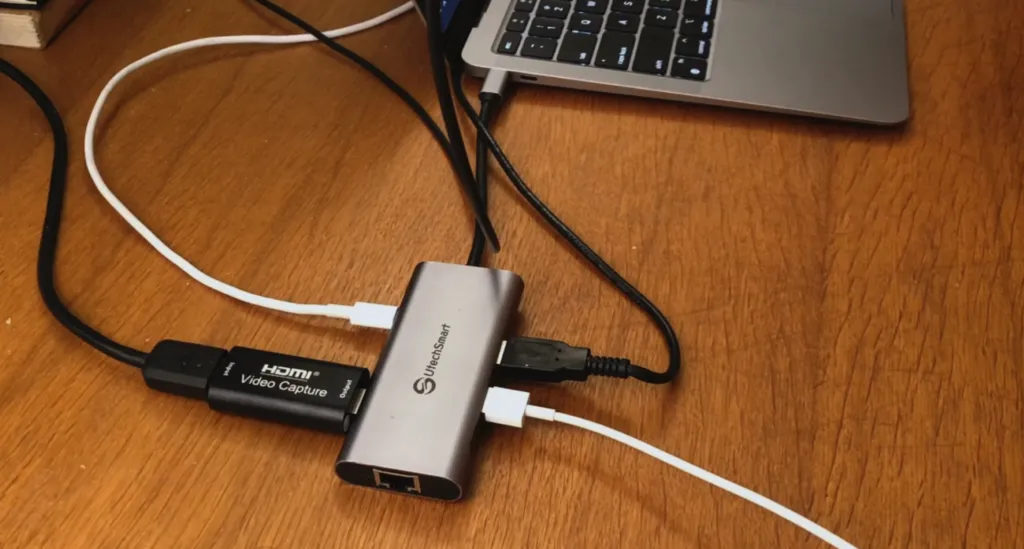
Connected to the laptop is a USB-C hub with multiple USB-A ports and passthrough power. I am using an HDMI Capture card to get the HDMI out signal from my Canon EOS M200 mirrorless camera. Using standard USB-A to Lighting cables I have two iPhones connected to the hub which also act as a second and third camera.

USB-C Hub with a cheap HDMI capture card
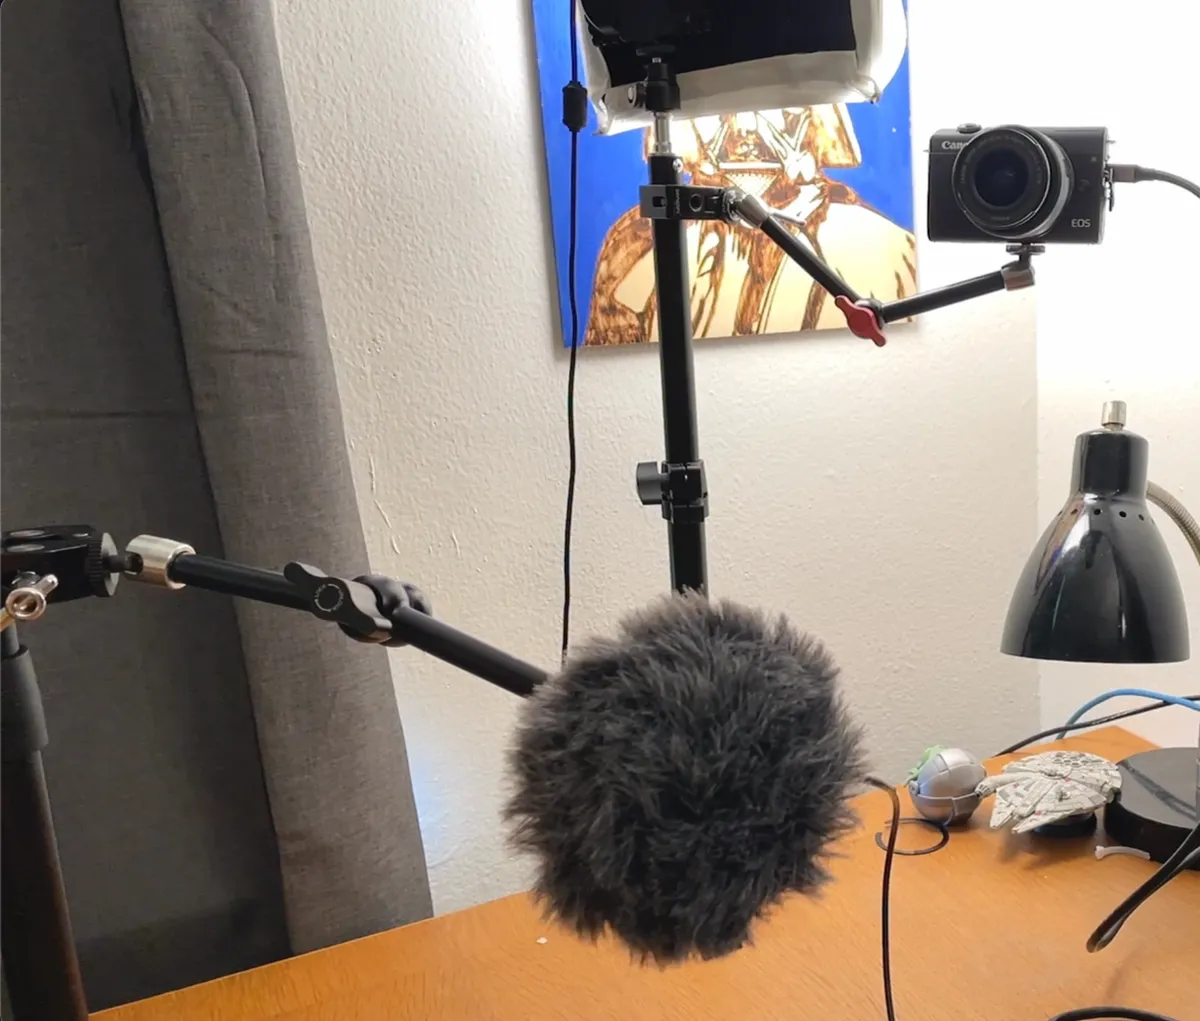
Everything is propped up on a variety of friction arms and little tripods. You can use any mounting hardware you wish but this method gives me a level of modularity and portability that a huge tripod does not. For example, I often need to switch between setups at my desk and workbench. With the friction arms I can mount my cameras at any angle and move my microphone into position too.

Friction arms help in small spaces and support various configurations
The bare minimum you need to get multiple camera angles recording simultaneously is a computer capable of encoding 4k video, not necessarily a laptop, and a few spare cameras from Android or iOS smartphones. Modern smartphones and even many years back can record 4K video and under the right lighting can even provide some good results at 1080p like I am using them here.
I am using a combination of the Camera for OBS Studio App and the iOS Camera plugin for OBS (Open Broadcaster Software) to get the video feeds out of the iPhones. Any iPhone that supports the app will work over USB. I am using an iPhone X and an iPhone 12. There is also an alternative method for Android phones with a separate plugin for OBS called DroidCam with its own Android app. In a similar fashion you can plug the Android phone into the computer over USB and collect the camera feed as a source for that plugin in OBS.
The full list of plugins and apps necessary as well as links to their installation instructions:
OBS (Open Broadcaster Software)
Camera for OBS App (iOS and OBS Plugin)
DroidCam Usage Instructions ( OBS Plugin)
The OBS scene setup is quite simple:
In the OBS settings, then in the Video section, set the Base canvas and Scaled Output Resolution to 3840x2160. This will give you a 4K canvas to work with in your scenes.
In the Output settings tab, set the Output mode to Advanced and click on the Recording tab beneath that.
Pick the file location, audio tracks, encoder, and bit rate you wish to record with. (If you wish to scale your stream output for broadcasts to something lower than 4K like 1080p you can do this in the Rescale Output option in the Streaming tab.
Apply these settings and close the settings menu.
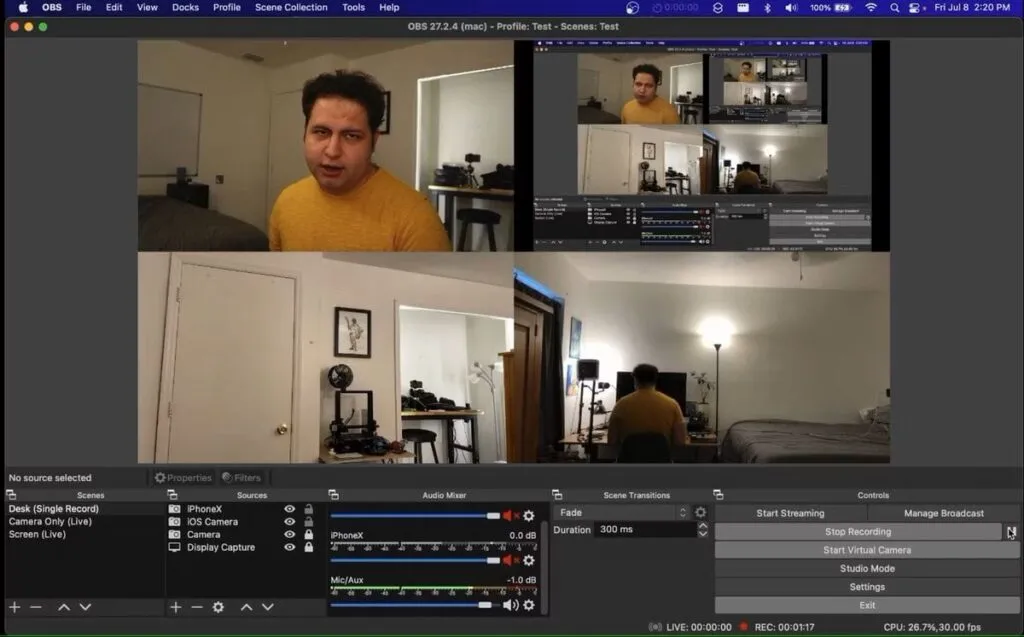
Create a new Scene. This is where the recording will take place.
Add the individual sources to the scene with their appropriate plugins (using the iOS Camera Plugin or Droid Cam Plugin)
Position each 1080p video source to a different quadrant of the 4K base canvas. These are 1920x1080 resolution video sources place alongside each other to create one 4K video file.
Press record!
The output will be a video file which is 4K but has to be cropped in editing to show the camera angles.

I record my files to .mkv format. This way if there is a problem with OBS or power to my computer, I have a good chance of the data being safe as opposed to an .mp4 or .mov file. Later on, I use the Remux recordings feature under the File menu of OBS to convert them to .mp4 files for editing.
The editing process is fairly streamlined as well. I can drag a single clip for a scene into my editing software and duplicate the clips multiple times over the same audio capture. Then I can crop the 4K file to be four different 1080p shots. This will be a different process for every editing software but in DaVinci Resolve it is under the Inspector panel and the Transform and Crop settings. Once cropped, can change the duration of each clip stacked on top of one another to show the correct shot and build my sequences. The process of setting this up has been tedious but has been very worth it in terms of the time I spend recording and editing. I also just have a lot more fun recording videos and streams now than before!
I did try using the Source Record plugin for OBS but my current method gave me the most reliable results without crashing OBS on my laptop. This is probably because I am only encoding one stream of video to files instead of four at once when recording multiple sources. The Source Record plugin is still part of my setup when I stream however, as I can record the scene with the four sources while only showing what I want to on the broadcast side. If you don’t need 4K capture, I think this is a great option for a faster workflow and a cheaper setup altogether than some other multi-cam rigs. Not to mention I can control the entire setup from one laptop and can even pause the recording to gather my thoughts!